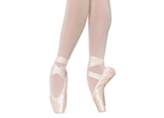
Marking Pointe Shoes for Ribbon Placement
- To begin, put your pointe shoe on the table in front of you so that the toe faces away from you, and the heel is closest to you.
- Put two fingers on the center of the heel material, and fold the heel down so that it touches the insole of the shoe. The entire heel should be folded down, so that the outer piping of the heel is now spread flat across the inner shank of the shoe.
- With pen, make a mark on either side of the inside lining of the shoe, where the heel is folded to meet it.
Preparing Ribbons for Pointe Shoes
- Take the entire length of ribbon that was supplied, and fold it in half and then half again. Cut along the folds, so that you now have four pieces of ribbon in equal lengths.
- In order to prevent fraying, burn the cut edges of the ribbon with a match or lighter. Be sure to blow out any small flames immediately so as not to lose any of the length of the ribbon.
- An alternative to burning the ribbons is to sew along the tip of each piece of ribbon, and up the sides about a half inch. This will also prevent fraying up to the point of the stitching.
Sewing Ribbons on Pointe Shoes
- Place the front edge of one of the ribbons on the mark that you made inside the shoe. The ribbon should be angled 45 degrees, with the end of the ribbon pointing toward the heel of the shoe. This will allow you to easily wrap the ribbon across the ankle first.
- With about a half-inch of ribbon inside the shoe, sew around the edges of the ribbon, attaching it to the shoe. Also sew across the top of the ribbon, where it begins to come out of the shoe, to make sure it is secure.
- In most pointe shoes, there is a layer of canvas lining inside the shoe, so that you can sew the ribbons through this first layer of lining and not through the entire shoe. If your shoes do not have this lining, and your stitches must go through to the outside of the shoe, be sure to use a thread that is clear or that matches your shoe’s color.
- Sew the second piece of ribbon in the same manner, on the other side of the shoe.
Sewing Elastics on Pointe Shoes
- Position each end of the elastic piece on either side of the back seam of the shoe, about a half inch away from the seam.
- here are two ways to use elastic on pointe shoes. The first is to create an ankle strap with the elastic, so that you would slip your foot through the elastic strap before placing it in the shoe. This can aid those with high or developed arches to keep the shoe on their feet. It can also give extra support. Be sure to measure the elastic on your own ankle so that the length will be correct.
- The second way to use elastic is to create a small loop at the back of the shoe, so that the ribbon can be pushed through the elastic before wrapping around the foot. This helps the shoe to not slide off the heel, and also keeps the ribbon more uniform. A piece of elastic about an inch in length should be used for this.
- Either, or both, of the elastics can be used on the pointe shoe. Both should be sewn about a half-inch on either side of the shoe’s back seam.
When you have finished sewing the ribbons and elastics on both of your pointe shoes, you should show them to your instructor. Especially if this is your first pair of shoes, your teacher will need to make sure that the ribbons and elastics are secured correctly so that you will not injure your feet or ankles when rising on pointe


